Bushy Park border planting guide for Teddington gardens
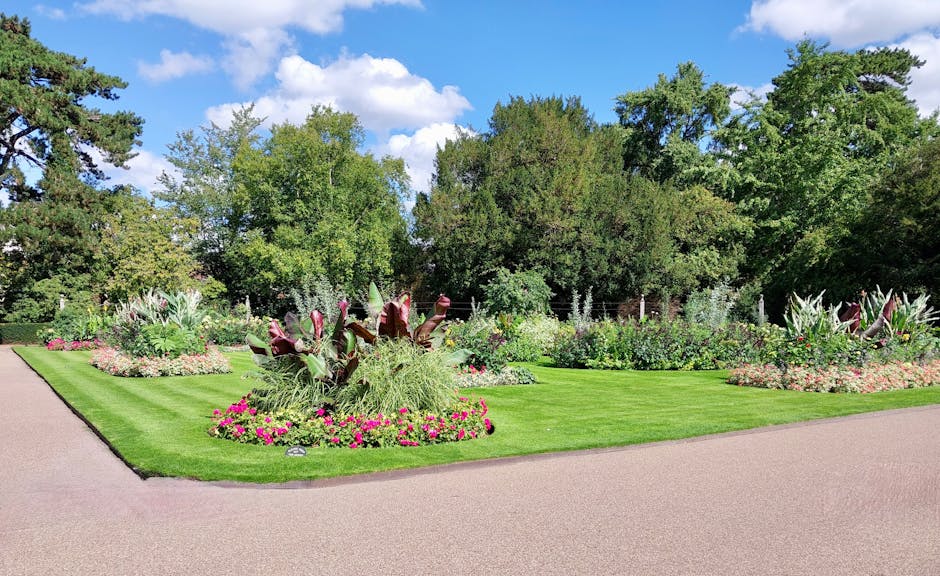
If you want a border that feels calm, leafy, and properly suited to Teddington rather than lifted from a glossy magazine spread, this guide is for you. A Bushy Park-inspired border planting scheme is really about capturing that soft, wooded, mature feel you notice near the park: layered structure, generous texture, and planting that looks good through the year without becoming needy. Done well, it can make a small garden feel settled; done badly, it can turn into a jumble of thirsty plants, awkward gaps, and constant trimming. And let's face it, nobody needs more gardening stress.
In this Bushy Park border planting guide for Teddington gardens, we'll walk through how to plan the border, choose plants that suit local conditions, avoid common mistakes, and keep everything looking good with realistic maintenance. You'll also find a practical checklist, a comparison table, and a few grounded examples from the sort of gardens people actually have around Teddington.
Why Bushy Park border planting guide for Teddington gardens Matters
Bushy Park has a particular atmosphere: open but sheltered, leafy but not chaotic, structured yet still natural. That balance is exactly what many Teddington homeowners want at the edge of a lawn, terrace, fence line, or path. A border like this can soften hard landscaping, make a garden feel more private, and create seasonal interest without looking overworked.
It matters because many gardens in the area have to do a lot in a small space. You may want privacy from neighbouring windows, colour in spring, shade tolerance near mature trees, and enough resilience to handle dry spells in summer. On top of that, the planting needs to work in real life, not just in a plan. A border should be attractive from the kitchen window, survive the odd neglected week, and not demand a full-time gardener.
There's also a local angle worth respecting. Teddington gardens often sit in the influence of larger mature planting, sheltered microclimates, or tree canopies, especially around older properties. That means soil can be rooty, shade may shift through the day, and moisture levels can vary wildly. A good border design responds to those conditions instead of fighting them.
If you are planning a full garden refresh, it can help to think beyond planting alone. Services such as landscape gardening and landscaping often shape the whole space first, so borders, paths, and seating all work together rather than as separate jobs. That sounds obvious, but it is surprising how often the border is treated like an afterthought.
How Bushy Park border planting guide for Teddington gardens Works
The basic idea is simple: recreate the feeling of a mature, layered park edge using plant groups that can handle ordinary garden conditions. That usually means a strong backbone of shrubs, a middle layer of perennials and grasses, and lower plants or ground cover to knit everything together. Think in tiers rather than a flat row. Borders look far richer when height shifts gradually instead of jumping from tiny to towering.
A Bushy Park-style border is not about copying wild woodland exactly. It is about borrowing the rhythm of woodland planting. You want repetition, depth, and movement. A few structural shrubs hold the line. Repeated perennials add rhythm. Grasses or ferns can bring softness. Bulbs and seasonal accents prevent the border from looking static in March or November.
The real trick is choosing plants with overlapping jobs. One plant may provide winter shape, another summer flower, another autumn colour. If every plant only looks good for three weeks, the border will always feel patchy. If everything flowers at once and then disappears into green blobs, you lose the point. Balance is the game.
In practice, the system works best when you start with site conditions:
- Sun or shade - full sun, partial shade, or dappled light will change plant choices dramatically.
- Soil type - free-draining, heavy clay, sandy, or root-competed soil all behave differently.
- Water access - a border close to the house may be easier to irrigate than one at the far end of the garden.
- Viewpoints - what do you see from indoors, the patio, or the side return?
- Maintenance appetite - be honest here. If you only prune twice a year, design accordingly.
That last point is often the one that saves the project. A border should suit the gardener, not the other way round. Truth be told, the most beautiful border in May can become a bit of a circus by August if it is too demanding.
Key Benefits and Practical Advantages
A well-planned border does more than "look nice". It changes how the whole garden feels.
- It creates structure - especially useful in narrow or awkward gardens where everything can otherwise feel flat.
- It improves privacy - layered planting can screen sightlines without building a harsh barrier.
- It adds seasonal value - different plants peak at different times, so the border stays interesting.
- It supports wildlife - even modest planting choices can help bees, butterflies, and birds.
- It softens hard materials - fences, paving, and decking sit better when greenery breaks their edges.
- It can reduce visual clutter - a calm planting scheme makes a garden feel larger and more intentional.
For many Teddington homeowners, one of the biggest practical advantages is maintenance control. A good design can reduce the need for frequent replacements and rescue planting. That means fewer emergency trips to the garden centre, fewer gaps after a hot spell, and less of that awkward "what on earth do I do with this corner?" feeling.
There is also a wellbeing benefit. A border with texture, shade, and movement changes the mood of a garden. On a grey morning in late February, even a few evergreen stems, upright grasses, or emerging bulbs can make the space feel alive. That matters more than people admit.
Who This Is For and When It Makes Sense
This planting approach suits a wide range of gardens, but especially those that need a refined, natural-looking finish rather than a rigid formal layout. If your outdoor space sits near mature trees, faces a boundary that needs softening, or already has some hard landscaping in place, this style can work very well.
It makes sense if you:
- want a border that feels established without waiting ten years;
- prefer layered planting over clipped formality;
- need privacy from neighbouring homes or upper windows;
- have a mixed light garden with sun, shade, and pockets in between;
- want a lower-fuss scheme that still feels alive across the seasons;
- are updating a tired border that has become full of mismatched survivors.
It may be less suitable if you want a very crisp, minimal, architectural scheme with lots of repeated symmetry and hard edges. You can still borrow elements from the style, of course, but a Bushy Park-inspired border leans more toward softness and depth than strict geometry.
If you are already planning wider improvements, it may help to review your overall service needs. A look at services overview can be useful when deciding whether your project needs planting only, or a broader garden tidy-up first. Sometimes the honest answer is: a bit of both.
Step-by-Step Guidance
Here is a practical way to build the border without overcomplicating it.
1. Assess light, soil, and shelter
Start by watching the border at different times of day. Morning sun can be very different from afternoon sun, especially where trees or nearby buildings cast shifting shade. Dig a small test hole if needed. Check whether the soil is dry and crumbly, sticky, root-filled, or fairly even. This tells you a lot more than a plant label ever will.
2. Decide what the border must do
Ask the blunt question: what is this border for? Privacy, colour, year-round structure, pollinators, or simply making the garden feel finished? You can have more than one goal, but there should be a clear main one. Otherwise the border starts trying to be everything and ends up being mediocre at all of it.
3. Build the backbone first
Choose a small number of structural shrubs or evergreen plants. These are your anchors. They hold the design in winter and keep the bed from looking empty when flowers go over. Repetition is useful here. Three or five of the same plant often looks better than a random collection of one-offs.
4. Add medium-height perennials
This is where most of the movement and seasonal change comes in. Choose perennials that flower at different times, and think about foliage as well as blooms. A plant with lovely leaves but modest flowers can earn its place just as much as a showier one.
5. Fill lower gaps with ground cover or bulbs
Ground cover helps suppress weeds and makes the border feel finished. Bulbs can be tucked between perennials so that spring arrives with a little surprise. Nothing dramatic. Just enough to make you smile when the first shoots appear.
6. Mulch, water, and settle the border
Once planted, water deeply and mulch the soil to help retain moisture and suppress weeds. This is one of those unglamorous steps that makes a huge difference. Skipping it is like buying decent shoes and never tying the laces.
7. Review after the first growing season
Most borders need a small adjustment after a year. Something may be too tall, too thirsty, or oddly pale in a particular spot. That is normal. A good border evolves, and a sensible gardener accepts that the first draft is not the final novel.
Expert Tips for Better Results
The best border plantings usually have a few quiet rules behind them.
- Repeat shapes and textures rather than repeating only colour. Feathery, upright, broad, and glossy foliage gives the border depth.
- Use evergreen structure sparingly so the border stays calm rather than heavy.
- Allow for mature spread. New planting can look sparse at first, but it should not become crowded in two summers.
- Group plants in drifts. Odd numbers often feel more natural than strict pairs.
- Think about the winter view. A border that only shines from May to September is missing a huge part of the year.
- Choose plants you are willing to edit. Some plants look amazing but need regular deadheading or tidy-up cuts.
A small but useful habit: stand at the back door with a mug of tea and look at the border from there before making final choices. That view matters more than a sketch on paper. Most gardens are lived in from one or two angles, not all around like a botanical display.
Also, mix a little discipline with softness. Too many soft plants, and the border loses definition. Too many rigid forms, and it starts to look stern. The sweet spot is somewhere in the middle.
Common Mistakes to Avoid
Here are the errors that cause the most regret later.
- Buying plants for the label rather than the site - a plant can be lovely and still be wrong for your soil or shade.
- Overcrowding at planting stage - instant fullness is tempting, but it can lead to competition and poor airflow.
- Ignoring root competition - common in gardens near mature trees, and often underestimated.
- Forgetting winter structure - bare borders can feel surprisingly bleak for months at a time.
- Using too many different species - variety is good, confusion is not.
- Choosing high-maintenance plants by accident - a border should suit your routine, not your aspirations on a sunny Sunday.
- Not planning access - if you cannot reach the back of the border to weed or prune, it becomes annoying very quickly.
One of the sneakiest mistakes is planting everything too close to the edge. It looks neat on day one, but within a season some plants spill over paths or fight the lawn edge. That is when people start saying "it was fine in spring" with a tired smile.
Tools, Resources and Recommendations
You do not need a van full of equipment, just the right basics.
- Spade and hand trowel for planting and small adjustments.
- Fork and rake for loosening and levelling the soil.
- Mulch to protect moisture and soil life.
- Watering can or hose for the first establishment period.
- Gloves and secateurs for pruning and deadheading.
- Plant labels or a simple sketch so you remember what went where.
If the border is part of a larger refresh, you may also want support with garden maintenance to keep the planting on track after the initial work. For borders that need a first clean-up before planting begins, garden clearance can remove dead growth, clutter, and awkward old material so you are starting with a blanker canvas.
For gardens where hedges or boundary lines are part of the planting picture, hedge trimming can help maintain light and shape around the border. If taller trees are causing too much shade or root competition, tree lopping and removal may be relevant, though that should always be approached carefully and professionally. No one wants to solve a shade problem by creating three new ones.
Law, Compliance, Standards, or Best Practice
For ordinary domestic border planting in Teddington, the main concerns are less about formal regulation and more about responsible best practice. If you are working near shared boundaries, mature trees, or drainage features, it is sensible to be careful and avoid assumptions. Some trees may be protected, and some boundary arrangements are shared, so any major change should be checked properly rather than guessed at.
Health and safety also matters, even for what seems like simple planting work. Digging, lifting, cutting, and using tools can all create avoidable risks. Good practice includes wearing gloves, lifting sensibly, keeping pathways clear, and using the right tool for the task. If you are arranging work through a contractor, it is reasonable to ask how they manage safety and insurance. The team's health and safety policy and insurance and safety information should give you a sense of how seriously they take those responsibilities.
It is also fair to think about environmental handling. Reusing suitable soil, composting green waste where appropriate, and minimising unnecessary disposal are all part of a sensible approach. If sustainability matters to you, a page like recycling and sustainability can help show how garden waste and materials are managed with care. Small things, but they add up.
Options, Methods, or Comparison Table
There is more than one way to build a border with a Bushy Park feel. The best option depends on the garden's light, size, and how much upkeep you want.
| Method | Best for | Pros | Trade-offs |
|---|---|---|---|
| Layered shrub-and-perennial border | Most Teddington gardens | Balanced, seasonal, good structure | Needs thoughtful spacing and pruning |
| Mostly evergreen border | Privacy and year-round shape | Reliable structure, less seasonal bare ground | Can feel heavy if overused |
| Pollinator-led border | Sunny beds and wildlife interest | Excellent summer interest, lively look | Can look tired in winter if not balanced |
| Low-maintenance mixed border | Busy homeowners | Practical, forgiving, easier to manage | Less dramatic than a highly curated scheme |
| Shaded woodland-style border | Under trees or north-facing edges | Natural feel, suits dappled light | Plant choice narrows quite a bit |
For many gardens, the layered shrub-and-perennial model is the safest choice. It gives the most flexibility and tends to age well. If you want a border that feels like it belongs in the landscape rather than being pasted onto it, that is usually the route to take.
Case Study or Real-World Example
A typical Teddington garden might have a rear border running along a fence, with a small patio nearby and a bit of afternoon shade from neighbouring trees. The owners want privacy, a softer view from inside, and plants that do not collapse into mush after a warm spell. Fair request, really.
In a case like that, a sensible design might start with a few evergreen shrubs placed at intervals to hold the line. Between them, you could layer medium perennials for flowers and foliage texture, then add lower plants around the front to tie everything together. A couple of spring bulbs would lift the border early in the year, while a grass or two would give movement in late summer and autumn.
What usually changes the outcome is not the plant list itself, but the discipline of spacing and repetition. The best version of this kind of border does not feel crowded. It feels calm. The fence disappears a bit. The patio edge feels softer. Indoors, the view becomes more forgiving on a rainy Wednesday afternoon when nothing else in the garden looks remotely impressive.
In our experience, the first season is the most educational. One shrub may outperform the others, one perennial may sulk, and one corner may turn out drier than expected. That is not failure. It is useful information. The gardeners who get the best results are usually the ones who adjust gently instead of starting again from scratch.
Practical Checklist
Use this quick checklist before planting or replanting your border.
- Have I checked the light at different times of day?
- Do I know whether the soil is dry, heavy, rooty, or reasonably free?
- Have I decided what the border needs to do first: privacy, colour, structure, or wildlife?
- Are there enough evergreen or structural plants for winter shape?
- Have I repeated key plants for rhythm rather than filling every gap differently?
- Will I be able to reach the back of the border for maintenance?
- Have I allowed space for mature spread?
- Do I have a plan for watering and mulching after planting?
- Have I considered nearby hedges, trees, or hard landscaping that may affect light and roots?
- Is the maintenance level realistic for my schedule?
If you can tick most of those boxes, you are in good shape. If not, pause and refine the plan. That tiny bit of patience often saves a lot of money and a fair amount of backache later on.
Conclusion
A Bushy Park-inspired border works so well in Teddington because it matches the area's feel: mature, green, and quietly elegant, without tipping into fussiness. The best schemes are built on honest site assessment, layered planting, and practical maintenance. Keep the structure simple, repeat key plants, and let texture do some of the heavy lifting.
The real goal is not perfection on day one. It is a border that settles in, grows into itself, and starts to feel like it has always been there. That is the lovely bit, actually. When the planting is right, the garden stops shouting for attention and simply becomes a place you want to stand in for a minute longer.
If you are planning a full refresh or want help turning a rough idea into a proper planting plan, you can explore the wider range of support through about us or look into pricing and quotes when you are ready to take the next step.
Get a free quote today and see how much you can save.
Frequently Asked Questions
What makes a Bushy Park-style border different from a standard garden border?
It is usually softer, more layered, and more natural-looking. Instead of one flat row of plants, you get repeated structure, varied heights, and foliage that creates depth through the seasons.
Which plants work best for Teddington gardens?
The best plants depend on light, soil, and moisture, but in general you want a mix of structural shrubs, reliable perennials, and some ground cover. The exact choice should suit your border rather than a generic list.
Do I need full sun for this style of planting?
No. It can work in sun, partial shade, or dappled light. Shade simply changes the plant palette, so the design needs to respond to the actual site conditions.
How much maintenance does this kind of border need?
Usually moderate maintenance. You will need seasonal tidying, weeding, cutting back, and occasional reshaping, but a well-designed border should not demand constant intervention.
Can I create this look in a small Teddington garden?
Yes, absolutely. In smaller spaces, repetition and restraint matter even more. A few well-chosen plants can make a bigger impact than a crowded mix of many different species.
What is the biggest mistake people make?
Planting for looks alone without checking site conditions. A plant can be beautiful and still fail if it hates the soil, light level, or root competition in your garden.
Should I plant everything at once or phase it in?
Either can work. Phasing is often sensible if you are unsure about the site or budget. Planting in stages also gives you time to see how the border responds before committing further.
How do I keep the border looking good in winter?
Focus on evergreen structure, strong stems, and a few plants with architectural shapes. Winter interest does not need to be loud; it just needs enough form to stop the border going flat.
Do I need professional help for border planting?
Not always, but it helps if the border is large, shaded, root-heavy, or part of a wider redesign. A professional can usually spot problems early and save a lot of trial and error.
Can hedge lines or trees affect the border?
Yes, quite a lot. Hedge shade, falling leaves, and tree roots can all affect moisture and light. If those elements are nearby, they should be factored into the plan from the start.
Is mulching really necessary?
It is one of the most useful finishing steps. Mulch helps retain moisture, suppress weeds, and protect soil structure. It also makes the whole border look more settled.
What should I do if part of the border keeps failing?
Check the conditions there first. A failing patch is often telling you something useful: too dry, too wet, too much shade, too much root competition, or simply the wrong plant choice for that exact spot.